I still remember my first introduction to Chinese tea and the fascination that surrounded the multiple infusions, and especially the gaiwan and those super cute, tiny Yixing teapots! Fast forward a few years and it’s easy to take all that ‘hardware’ for granted, but when you’re just discovering the bold new world of tea, choosing a good vessel can be the difference between throwing in the tea towel or advancing into a bold new world of flavor and lifestyle. Let’s look at how to choose and use a gaiwan or a yixing teapot so you can get started.
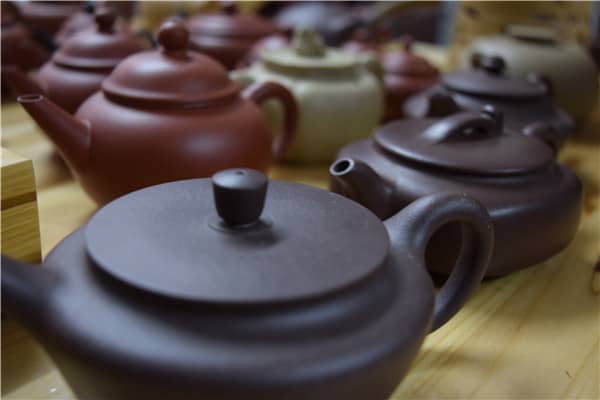
Yixing Clay Teapot
The Yixing teapot is somewhat less foreign since it has a recognizable form, It’s just a teapot, shrunk to fit in the palm of your hand! The size isn’t the only thing that makes these teapots different, they’re also made from special clay from Yixing. The Yixing teapot might seem like a good first brewing vessel, but I’m inclined to nudge people in the direction of the gaiwan for two reasons. Yixing teapots are best suited to one type of tea (black, oolong, dark, etc.) or even a single tea (lapsang souchong, tie guan yin, etc.) and because we cannot see the liquor colour and they take a while to pour out, they are actually a little trickier to brew with when compared to the gaiwan. That being said, a first teapot is a WONDERFUL thing!
The most important thing about getting a Yixing teapot is to get a real one.
That is, get one made with real Yixing clay which is not rare or hard to find. Probably the best tip here is to get your teapot from a trusted vendor, and if the price is too good to be true, it probably is!
A couple of other things to watch for are the colour of the pot and the size.
I find lighter coloured pots very pretty, but they require a personality type I simply do not possess, meticulousness! Light pots need to be taken care of fastidiously. Well, this actually applies to all teapots, but a light coloured teapot will show stains more easily, exposing your every misstep. You also want to choose a teapot with a lid that is big enough to fit the leaves you want to brew. A tiny lid won’t easily accept long straight rock tea leaves, for example.
Once you’ve selected your new teapot and have it at home, there are a few more steps before we can get our zen on at the tea table. Namely, the teapot needs to be seasoned. Here’s how:
- New teapots often have clay dust inside them. So give your pot a good rinse to start off.
- Place your teapot on a clean cloth in the bottom of a cooking pot. The pot should be big enough so that there is space all around the teapot and so that the teapot can be submerged.
- Fill the teapot (so it won’t float) and the pot with cold water so that the teapot is underwater.
- Bring the pot of water to a boil, then simmer for about 20 minutes. Once it’s done simmering, turn the heat off and leave it to cool.
- Once cooled, retrieve your teapot and empty it out.
- Add some tea leaves of the type you’ve chosen for the teapot. You don’t need a lot, and you don’t need to use your best tea here, we’re just introducing the tea aroma into the clay of the teapot.
- Fill the teapot with boiling water and let it sit overnight.
Your teapot is now ready for a lifetime of brewing!
One more caution about teapots. They come in all shapes and sizes and they are super cute and in some cases breathtakingly beautiful. As such, they can be highly addictive. Consider yourself warned!
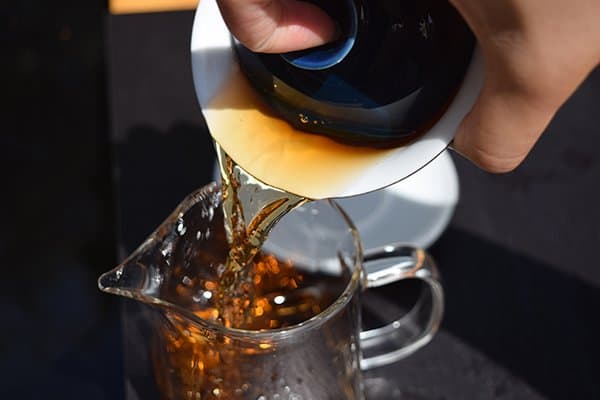
Gaiwan
Enough about teapots! The real workhorse of gongfu brewing is the gaiwan. This vessel is versatile, easy to use (I really mean that), and I feel it’s a ‘closer’ experience with the leaf, hence, a better vessel to learn how to brew with. It can even be used for drinking tea too!
To get a good start with gaiwan brewing you’ll want to really follow these tips. Using a gaiwan means getting up close and personal with your tea, and with boiling hot water. Following these tips will make life a LOT easier for your fingertips!
Shape and size are critical.
Make sure the gaiwan you choose fits in your hand and feels good. Hold it as if you are brewing and imagine making tea with it. A gaiwan that is too big or too small will be tricky to hold.
For maximum versatility get a glazed gaiwan.
The glazed finish will allow you to simply rinse the gaiwan and brew all tea types. The none-porous structure allows the gaiwan to present true aroma and taste of a tea.
Choose thin porcelain!
There’s a tendency to choose a thick gaiwan among first-timers to put some distance between the boiling water and the fingertips. But this is actually going to work against you. Once porcelain heats up, it stays hot, so by your 2nd or 3rd infusion, a thick-walled gaiwan is untouchable! Thin porcelain not only looks better, but it cools a lot faster and will carry you comfortably into those late infusions.
Finally, liquor colour is always your guide when brewing tea, so choose a gaiwan that’s white inside.
The basics of using a gaiwan are simple.
Rinse the gaiwan with boiling water first. This gets rid of other tea aromas and residue that may be lingering. It also makes the next step more fun!
Add your leaf! Since you’ve rinsed with hot water in the previous step, the dry leaf aroma should be quite wonderful. Take some time to enjoy it.
The next steps will be repeated, whether you’re rinsing or brewing your tea.
Fill the gaiwan to just below where the lid sits. Don’t overfill it. This will leave the gaiwan rim cool enough to pick up once the tea is ready.
I use two main grips to pour out the gaiwan. The overhand grip, and the underhand grip.
Overhand Grip:
- Position the lid on a slight angle so that the tea can be poured out.
- Grasp the gaiwan rim with your thumb and middle finger.
- User your index finger to hold the lid in place. I lay my finger across the knob to achieve this.
- Pour out your tea.
See!? Easy.
Underhand Grip:
- Again, position the lid on a slight angle so that the tea can be poured out.
- Pick up the gaiwan with your non-dominant hand and place your middle and ring fingers of your dominant hand under the gaiwan.
- Use your thumb (dominant hand) to hold the lid in place. You can let go with your other hand now.
- Pour your tea.
See!?! Even easier!
I was surprised to learn during a visit to China that the gaiwan is also a drinking vessel! Mr Xu, inventer of Bi Tan Piao Xu had served us up some Xu Gong Cha (his personally hand made version of Bi Tan Piao Xu) and we each had a gaiwan and I couldn’t see a sharing pot or a teacup anywhere in sight. I started to sweat. But don’t worry, this is actually pretty easy too.
Drinking from a Gaiwan:
- Pick up the whole gaiwan using the saucer. You’ll want to make sure the gaiwan is properly seated in the saucer before you do this.
- Remove the lid and use it to ‘swoosh’ leaves away from the spot closest to your mouth.
- Either with the lid holding the leaves back or with the lid removed, take a sip!
Now you’ll look like a pro when it comes time to drink tea straight from a gaiwan!
Now you know how to choose your first gaiwan and your first teapot and how to use them! If you are just getting started and wondering which way to go, I humbly suggest the gaiwan, due to its versatility, ease of use and the direct feedback you get being able to observe the tea while it infuses. But there is no right way to get into fine tea, just enjoy the journey and keep exploring and sipping!
